Training
Performance Horses
Lesson Five
FIRST RIDES, TIPPING NOSE, BALANCE
Before you started saddle training the youngster, you established goals. You made a decision as to what you wanted to accomplish and you accepted the fact you have the ability to complete the task. You accepted your own creative potential. In addition, you took a position of not judging the colt’s actions as either good or bad, but simply as the actions of a youngster, which deserved praise or a confrontation and correction.
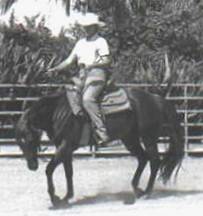
As you start your first real rides on the young horse, you must make a commitment to always give to your new partner. The young horse will learn more quickly if you give him freedom to experiment. You also must give him the opportunity to perform on his own once he has recognized the request. In addition, give him praise or punishment as needed, and give him the chance to realize his true potential.
When you rode in the stall and during the first few rides outside, you were getting the horse to move forward simply by tipping his nose to the left or right. This caused him to lose his balance in one direction or the other. He took a step in that direction to catch his balance and reestablish his equilibrium. Now you are ready to add some new vocabulary to the horse’s small, but expanding language skills.
The walk is a four beat gait. The first stride is always a hind foot. Remember: all action initiates in the hindquarters. If the sequence should start with the right hind, the right forefoot will move forward before the right hind reaches full extension and is placed on the ground. The right forefoot must get out of the way of the right hind because, as it completes its flight, it will overreach the hoof print of the right foot. The third stride in the sequence will be the left hind foot, followed by the left forefoot, the fourth stride.
The only constant aid every rider has is his weight. The moment you sit in the saddle, your weight is an aid--a fact you cannot change. Because your weight is a constant aid, you must always consider it in every communication, and you must be sure your weight is positioned correctly to give rather than take from the horse’s performance.
The first cue you are going to teach is the “head down” cue.
Before you make any movement, forward or backward, you want the horse to put his head down, and this goes for any horse, any discipline. (You’ll be able to lift the horse’s head and neck for dressage, but that comes later when you start working “in frame.”)
To get the horse to put his head down you are going to give two cues at the same time. You are going to lift your reins slightly and begin a gentle see-saw action. At the same time, use both legs forward at the girth and give the horse little bumps with your heels.
The instant the horse moves his head down, stop both actions.
Pressure from you legs and the reins tell the horse you want something; movement, frame, change of direction, etc.; release of pressure tells the horse he has made the correct response.
Try it again…lift your hands slightly while gently see-sawing on the reins and bump the horse with both heels forward at the girth. Stop both actions the instant the horse responds.
As the horse learns the cue, you can stop the see-saw action on the reins…just lift the reins and bump the horse with your heels.
The following video shows the ultimate goal. It will take your horse several weeks to learn the cue and be able to respond as quickly as the horse in the video. Click here to watch video.
Do not move forward or ask for any other response until your horse puts his head down. It may not be perfect, but praise all attempts to respond correctly.
As soon as the head is down, stop all cues and release any pressure from your reins. With the horse relaxed and head down, we can begin to ask for the walk.
To cue the horse to walk, lift the reins slightly, giving the head down cue. Keep your weight back and slightly to the right. Do not rock your upper body forward. Press your right heel against the horse’s side to encourage the horse to drive off the grounded right foot. The horse will then actually start the sequence of strides with the movement of the left hind.
A rider will be able to feel which hind foot is grounded when the horse is walking. The hip of the grounded hind foot will be higher than the hip of the foot which is off the ground and moving forward. Every rider should practice, practice, practice; until he or she knows without looking which hind foot is grounded. You’ll know by natural feel. Advanced work is not possible, except by luck, unless the rider always knows which hind foot is grounded.
If the rider wants more impulsion (drive power--the fifth element of training) from the horse at the walk, the rider must apply leg pressure on the side of the grounded hind foot. This will cause the horse to extend the muscles with more effort, creating more forward power. Impulsion by a young horse is very hard to achieve, as it is a product of advanced training. Normally, all the young horse will do when additional leg pressure is applied is attempt to move faster rather than more powerfully. During the first few months of training, it is not necessary to ask for controlled impulsion.
If the rider should apply leg pressure while a hind foot is off the ground, it will cause the horse to contract the muscles and thereby lift the foot slightly higher. Controlling the arc of the foot flight is also an advanced exercise unnecessary to teach a young horse. While the rider/trainer should understand how to control the lifting of a hind foot, there is no need to control the foot flight of the young horse during this early work.
To control the direction of travel, the rider will look in the direction desired. If the rider wants the horse to move off toward the right, the rider should look to the right. Looking in the direction you want to go causes you to change your body position even if you are not entirely aware of the subtleties. As you look to the right, your weight will be shifted slightly onto your right hip. Your right shoulder will move back toward the horse’s right hip, and your left shoulder will move toward the horse’s left shoulder. If you do not force anything, but simply allow it to happen, your right leg will drop slightly back toward the rear of the horse and your left knee and thigh will push into the horse on the left side. Granted, these changes in position are almost imperceptible, but the horse will soon take notice. As the horse matures and gains a better understanding of cues, the horse will be able to read such cues as they are occurring.
As the rider begins to turn to look into the direction of travel, the final and most important directional cue is given. The rider tips the horse’s nose into the direction of travel.
Use two hands when using a snaffle. Tiny direct rein
tugs will tip the horse’s nose into the direction of travel. Always add
indirect rein pressure as the basis for starting neck reining.
You know the snaffle is the bit of
choice for educating the young. You know the snaffle is designed to be used
with two hands utilizing direct rather than indirect rein. To tip the horse’s
nose to the left or the right, the rider must lift the rein with enough force
to bump the horse’s mouth. In tipping the horse’s head to the right for
example, the right rein is lifted quickly upward and rearward, causing the
mouthpiece of the bit on the right side to press against the right side of the
mouth. This pushes the nose downward and the cheek piece on the left side of
the mouth pushes the nose of the horse to the right. Lifting of the rein must
be done quickly and followed by an immediate release. Do not pull the horse’s
head to the right and do not maintain a steady pressure on the rein. The action
is light, quick and stopped immediately. You want the horse’s nose to be
positioned to the right at the same time you are asking the horse, through
other cues, to travel to the right. Click
here to watch a video of the bump and release.
Let the young horse move along on a loose rein. If
you maintain constant contact with the horse’s mouth, the horse will soon start
leaning on the bit.
While you are teaching the rein bump and release to tip the horse’s nose into the direction of travel, you should also begin to teach the more advanced technique of having the horse tip the nose into the direction of travel as a response to leg pressure. Responding to inside leg pressure is the beginning of neck reining and keeps the horse from dropping a shoulder in a turn.
Do not attempt to force the horse to learn this lesson; it is to be used in conjunction with the “bump and release.” Over a period of time the horse will learn the lesson and will eventually only need the leg pressure. Then the bump and release can be eliminated.
Use your leg forward at the girth with a gentle bumping action at first. As the horse learns to respond to the bump and release of the rein, the horse will also begin to respond to the bump of the leg. Once the horse begins to respond, simply apply light leg pressure at the girth and praise the horse immediately upon the correct response of tipping the nose. Click here to watch video.
The horse won’t understand the cues (communication) at first, and the cues will have to be repeated again and again. The horse will generally move off to the right in a haphazard way, but will quickly lose his direction, forward impulsion and concentration.
This is the time for patience and then more patience. Each time you ask for a turn or movement, praise the horse when he performs somewhat as he should. When he fails to make an effort to perform correctly, he must meet with a confrontation--a bump with your heel, another stronger jerk on the rein. Wrong action must be corrected immediately and with enough minor punishment that the horse realizes his action was a mistake. Punishment is not to be severe. You are simply trying to make wrong action uncomfortable and correct action highly praised.
You never want to get a young horse frustrated, fearful or hot. If you do, he will lose all ability to learn. The horse only truly learns when he is relaxed and willing to concentrate on the lessons. You cannot force communication knowledge on a horse. You can force compliance for a short period of time, but it will never last. A horse is only "made" or "finished" when his compliance is through nonresistance (the third element of training) because he understands the request and wants to perform.
Practice walking, turning and stopping for several days. Do not attempt work at other gaits until you are positive the horse is ready for new information.
At this point, teaching the stop is simple. Give the verbal command to "Ho", then lift one rein or the other to establish a bit barrier to further forward movement. The rein not lifted should remain steady, holding the mouthpiece of the snaffle in place. Be careful that the bit pressure is not continuous and is not a pulling back action. The bit should be a barrier to forward movement, nothing more. The instant the horse stops, discontinue lifting the rein. Release all barriers. Allow the horse to relax and praise the horse for stopping.
Once the horse learns to give his nose to the tug
on the indirect rein, begin "pushing" the indirect rein into the
horse’s neck.
Once the horse learns to follow his nose, he’ll
begin turning easily. Now the rider can use light inside leg pressure to supple
and bend the horse.
If the horse does not stop immediately, confrontation is necessary and should come by your reaching farther down on the rein so the lifting action is much more dramatic. Be sure the barrier to forward movement is strong enough that the horse cannot fail to recognize the request. Practice more stops and be sure the horse gives at least one perfect performance before discontinuing the day’s lesson. You may have to request the stop 20 or 30 times before the horse does it correctly. Do not allow the horse’s failure to perform cause you to make bad choices in your response. See his failure to understand your cues yet as an opportunity to repeat the request. For horses, learning is a matter of repetition. The more often the horse does something, the quicker and better he will perform once he understands.
If the horse is walking, turning and stopping well, end the training session for the day. Always try to end with a positive performance, which deserves and receives praise. Each training session for the next several days should consist of walking, turning and stopping until the horse is completely relaxed and attentive to your requests.
The trot is a two-beat diagonal gait in which the right hind and the left forefoot move together, and the left hind and the right forefoot move together. The horse’s body is at its longest when the horse is walking. At the trot or jog, the horse must shorten his body and the foot flight becomes more elevated. He does not over stride the front footprints with the hind feet, as he does when walking.
To cue the horse to trot or jog, lift the reins to signal that new information is coming, then shorten the reins slightly to cause the horse to shorten his body. At the same time, squeeze the horse with both legs.
Once the rider has shortened the reins and cued the horse to shorten his body, and the horse has responded, then the rider must lengthen the reins slightly so the horse can move forward toward the bit. There should be no pressure on the horse’s mouth due to a short rein. The horse should move forward into the bit, and hold his body position to maintain the gait. There should be no rein pressure to force a shorter body position. The horse must learn to round up his back to maintain the shorter body position.
To increase impulsion at the trot, the rider presses the heel against the horse’s side corresponding to the grounded hind foot. The heel pressure should be left, then right just as the left hind, then the right hind are pushing against the ground, driving the horse forward.
It is at the trot or jog that the horse learns best. The horse tends to concentrate a little easier at the trot than at the walk. The gait is not too taxing physically, and the horse can do plenty of repetitions without fatigue.
Turning the young horse at the trot or jog will almost always involve the horse increasing in speed. As the rider turns to look in the direction of desired travel, the weight shift to the rear encourages the horse to drive harder, and the leg aids indicating travel direction are also initially interpreted by the horse as asking for more speed. To correct this, the rider should accentuate the lifting of the reins to tip the head into the direction of travel. The lifting of the reins is not a pulling action, but is simply the start of half-halts, one of the most productive exercises for decreasing speed, increasing impulsion and developing collection by bringing the hindquarters farther under the horse.
Lift your hands and apply leg pressure to request
the half-halt. Hold both hand and leg positions until the horse makes a
response, then release both.
Half-halts are exactly what the name implies--a half of a halt. All the cues for the half-halt are the same as the cues for a complete stop. However, just as the horse begins to make the stop, the rider releases the stop or halt cues and allows the horse to continue forward in a more compact and controlled position. Without a doubt, the horse will have decreased his speed since he will now have his body in a shorter, more rounded position. Allowing the horse to continue in the gait will eventually result in another increase in speed, even with highly-schooled horses. The rider will employ another half-halt to gather the horse again and decrease speed.
With very inexperienced horses, use the half-halt every two or three strides. Horses just learning to carry weight and respond to gait cues have a very difficult time maintaining a steady pace. Do not expect an even pace. It will take the young horse months to move at a smooth, steady speed.
Practice the transition from the walk to the trot so the horse can learn the communication cues. Also practice half-halts and complete stops. Do not work on downward transitions for another month or two. The young horse should not yet be asked to distinguish between very subtle cues such as the difference between downward transitions and the half-halt.
An excellent exercise for the young horse is the half-circle pattern. From a stopped position, ask the horse to trot. Move in a large circle so the horse is learning to pick up a gait immediately and move on an arc, following his nose. When you complete half of the circle, stop. Hold the stop position until the horse relaxes, then ask the horse to reverse the direction by turning toward the outside of the circle. Again, pick up the jog or trot and return to the original starting position. Stop and relax the horse. Then ask for another reversal of direction, again turning outward from the center of the circle, a turn in the opposite direction from the previous one. Continue the exercise until the horse has made 12 to 16 stops and turns. The repetitions will result in the horse thinking about the cues even before you give them. The horse is then ready to work when the cue is given, and the horse will enjoy your praise for responding correctly and quickly.
Give the young horse at least 10 days of walking, trotting and stopping before you attempt to lope or canter.
The canter or lope is a three-beat gait. For the left lead, the sequence of strides begins with the right hind foot on a short stride. That is the first beat. Then the left hind in a long stride moves at the same time as the right forefoot makes a short stride. The two legs moving simultaneously make the second beat. Finally, the left forefoot moves on a long stride, which is the third beat. The left hind leg on a short stride begins the sequence for the right lead.
The cues for the lope begin with a shortening of the reins to prepare the horse for new information. The reins must be slightly shorter than the position for the trot, since the canter or lope body position is even shorter than for the trot.

Loping on the left lead, the rider sits on her
right hip making the right hind leg short, driving stride.
To ask the horse to take the left lead, the rider must shift his or her weight back and toward the horse’s right hip. Shifting weight back and to the right assures the horse’s right hind stride will be short. If the rider will push his or her left leg forward, this will help keep the weight back, while relieving weight from the horse’s left shoulder. The rider then applies right leg pressure to get the horse to drive off the right hind foot. The young horse’s nose should be tipped slightly to the right to extend the muscles on the horse’s left side, opening the leading shoulder, making a long left stride easier for the horse.
The cues, of course, begin with the rider shifting his weight toward the horse’s left hip to ask for right lead.
Do not look down to see if the horse has taken the correct lead. Looking down at the left foreleg requires the rider to shift his weight forward, off the horse’s right hind leg, and almost always guarantees the horse will fail to pick up the correct lead. When a rider gets his or her weight out of the correct position, it makes it extremely difficult for a young horse canter or lope in balance.
Young horses simply are not strong enough yet to compensate for a rider’s incorrect body position.
Practice picking up the canter or lope until you can feel on the first stride if the lead is correct.
With 10 to 15 days of consistent work, you should be able to walk, trot, canter and stop the colt from any gait without the colt exhibiting irritation or discomfort. Don’t rush the lessons. Don’t attempt to force the colt to change gaits on a single stride, and don’t try to maintain a gait when the colt wants to quit. Young horses are not really very strong when it comes to carrying tack and riders. They tire easily and they need to stop frequently to rest and catch their breath.
Avoid any kind of a battle with a colt. Discipline is necessary, so when it is called for, use it, then stop. Follow discipline by asking the horse for a response you know he will understand, then praise him for his correct action.
It is your responsibility to think one step ahead of the horse. But don’t start thinking too far into the future. Keep your attention within the moment and you will not make many mistakes. So few things will go wrong, there will be less need for discipline.
And keep in mind you are teaching the colt a new language, not breaking a horse. There is a big difference. A teacher has an intelligent plan, but a horse breaker can only offer ignorance and pain. The teacher uses small confidences to educate the student, helping the student to understand and respond to their new common language. It takes time and patience, but it is well worth it.
It’s up to you. In the final analysis, the colt is being molded by you and will be exactly what you make him--nothing more, nothing less.
If the colt fails to understand requests, blame yourself.
When the colt succeeds by responding correctly, give yourself a pat on the back, and give him one too.
Assignment:
A video of you performing the exercises described in
this lesson is required.
In the video I want to see you riding at the walk, jog
and lope on a loose rein…I want to see a relaxed horse...this video is an example
of what I want to see: http://youtu.be/1qN02NA7nGk
You may post the video to a video hosting web site;
for example - PhotoBucket or YouTube.
Please send the link to cathyhansonqh@gmail.com
Thank you, Cathy Hanson