TRAIN FOR TRAIL CLASS
By Cathy Hanson
Lesson One
Selecting
a Trail Horse/Knowing the Basics
Learning
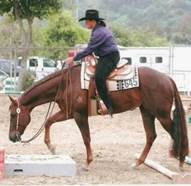
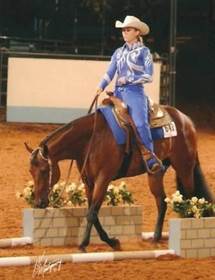
to ride and train a show-pen trail horse is both fun and rewarding.
Riding
and training a horse to navigate a course of obstacles by finding the easiest
way through without touching anything, is definitely a challenge. To do it, you’ll need near perfect
communication with your horse. And
you’ll need to develop smoothness and grace if you are going to win your class.
Of
course, you may just wish to learn to handle certain obstacles—opening and
closing gates—because you encounter them when on for an enjoyable trail ride.
No matter your reason for training a trail
horse, you’re going to find the task is “thought provoking”.
There
are some things trail is not.
Trail
is not a point and go type of ride. It
is not just hoping your horse will know what to do when faced with an
obstacle. (A horse will take the easiest
path, which is usually around an obstacle, not over it!)
Trail
is not forcing or demanding a horse to work an obstacle. (The horse will
usually win this fight, or if he eventually does work the obstacle it will not
be smooth with understanding, but rigid with anger or fear.)
Riding
trail obstacles correctly requires a trusting partnership with your horse. You must work together!
This
course will teach you how to communicate with the horse so he understands how
to correctly negotiate any trail obstacle you may encounter.
Any
horse can learn to ride over trail obstacles.
Old Hank out in the pasture can be taught how to do show-pen
trail…….but, how good Old Hank can be depends on several factors: his
conformation, his soundness, his natural talent, his disposition and his heart.
How
serious you are about competing in trail will determine how you choose your
horse. How successful your horse will be
will have a lot to do with how many of the needed “factors” are possessed by
the horse you choose.
If
you have a horse that currently competes in trail, his conformation is “fixed”
so you’ll need to do some “evaluating.”
If you are planning on purchasing a horse, let’s begin by selecting the
conformation that will lead to a successful show-pen trail career.
“Correct
conformation” based in efficiency of movement” is ideal.
Specialization
and specific events often require conformation that is not necessarily
“efficient”, such as a gaited horse, or dressage horses with elevated
forehands. But “efficiency of movement”
is an absolute for the great trail horse.
(To learn more about conformation, take the course: Conformation and
Selection for Performance---- www.horsecoursesonline.com/index/index_conformation_description.html
Correct conformation will in general refer
to a horse which is balanced, has good feet, straight legs etc. The more “correct” the conformation for
“efficiency of movement” the less stress on the horse’s joints, tendons,
muscles, ligaments, etc. Balance helps
make all types of movement easier for the horse.
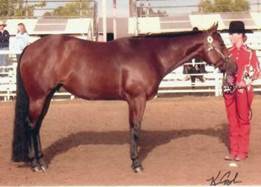
A
Balanced Horse
A
horse that lacks balance will be inefficient in his movement and will tend
toward soreness and injury. If the job
is difficult for the horse, he will not enjoy his work and will often look for
a way out of the job.
Trail
competition, especially in more advanced levels, requires an athletic
horse. The more difficult the level at
which you choose to perform, the more necessary “efficient” correct
conformation becomes.
A
horse whose conformation produces a big stride will have more difficulty
working show-pen obstacles. A horse
whose conformation creates too short a stride will have difficulty making the
proper number of steps required by some obstacles.
A
bulky heavily muscled horse will find it difficult to wrap himself around
obstacles. Bulk interferes with suppleness.
The
height and weight for a highly competitive trail horse has some range. A 15 to 16 hand horse can usually step
comfortably in the distances required. The horse that has a natural 3-foot trot
step and 6-foot lope step will be comfortable doing trail.
There
are some conformational shortcomings which can be overcome by other
factors…disposition is an example.
A
horse with a kind disposition which makes him “trainable” will be able to work
around conformational weaknesses. A
horse with a good disposition accepts his rider’s directions, usually has a
good work ethic and is compliant.
A
stubborn horse will cause difficulties in training.
A
spooky horse will not be easy to train, and will usually fail you when you need
him most. The horse must trust the
rider; a spooky horse has trust issues.
This type of horse, over a period of time, can learn to accept some
spooky obstacles, but when anything new appears, this horse has to learn to
trust all over again.
The
curious horse will tend to have good expression over obstacles, and usually
enjoys his job as a trail horse.
A
completely numb horse that flops around will not be careful over the
poles. A horse that does not like their
legs to touch things will be very careful.
“Heart”,
that desire to succeed, cannot be trained into the horse. “Heart” will make up
for many other weak areas. A horse with heart tries even when he is not
comfortable. A horse with heart tries when he is tired. A horse with heart
trusts. A horse with heart will save the
rider when the rider commits an error. A
horse with heart turns himself inside out to get over the pole, despite poor
directions from his rider.
A
perfect conformation horse without heart is pretty, but useless, or “pretty
useless”.
Talent is the ingredient we cannot train;
we can only enhance it. A very talented
horse can go to the top of the show world.
Everything is easy for the talented horse. He is willing; his cadence is
perfect; he is able to wrap his body around anything... He makes the most difficult obstacle look
easy. This horse loves his job!
When evaluating your horse, think about
his conformation, disposition, talent and heart.
Make
a fair assessment of your horse.
This horse is tall, with too much leg, and an
upright shoulder for a short stride.
He’s also camped under behind which reduces his overall balance.
Now
put your horse to work where he fits.
(If you ask the horse to work at the wrong job, don’t blame the horse
for failure.)
Putting the horse to work at a job that is
easy for him, makes him happy, and it makes you a better trainer. Your horse may be an entry level show horse,
a competitive trail riding horse, a ride in the hills on a Sunday morning trail
horse or a champion show-pen trail horse.
Whatever category your horse falls into doesn’t matter when it comes to
learning to work trail obstacles--every horse is able to learn the fundamentals
of trail. Every horse can side-pass, back, walk over a bridge, lope, jog, cross
over poles, work a gate and serpentine through cones, but not every horse can
do it easily.
BEFORE
YOUR START TRAINING FOR TRAIL
Your
horse will need some good basic training before you begin teaching the mastery
of trail obstacles.
A
green horse can be taught simple obstacles, but it will take a more advanced
horse to negotiate more complex obstacles.
Your
horse will need to understand leg cues, direct and indirect rein aids, know his
leads and be relaxed in the walk, jog and lope, as well as know the basic
concept of collection.
Before
the horse can be taught anything, the rider must be in balance with the horse
and using the aids correctly.
The
horse is a reflection of the rider. The
horse will be responding to what he feels from the rider. If the rider is leaning to one side, the
horse will be trying to re-balance the rider by drifting or leaning.
The
rider’s correct position is essential to teach the horse the aids needed for
communication.
The
rider will be teaching the horse a communication system which allows the rider
to ask clearly for the horse to perform a certain maneuver. The horse will respond correctly because he
understands the communication. The
understanding is the result of trial and error on the horse’s part and
repetition on the trainer’s part.
The
rider will cue the horse for a maneuver and then proceed to open a door for the
horse’s correct response. The rider
helps the horse by closing doors that lead to the incorrect movement – leaving
only the correct choice available. To
open and close doors means to clear an opening or block a path for the
horse. An example of closing a door is
applying a leg to the horse’s side. We
do not want the horse to move into leg pressure, which the horse must actually
learn as it is an unnatural reflex. When
the horse has learned not to move into pressure, and pressure is applied to one
side, the door on that side is “closed.”
The horse soon recognizes he is blocked on one
side, but not the other – so that door is open.
The horse moves away from the pressure. This is why it is so important to be
sitting correctly, so that the correct door is opened and the correct door is
closed. The horse will move through the
open door easily, and quickly learns to seek the open door as “the easy and
correct way.”
The
rider’s position is very important if the rider is to communicate
effectively. The rider must be balanced
in her seat, and use her hands and legs correctly.
Your
weight is a cue that is always involved, so it is extremely important to sit in
the center of the saddle. Any weight
shift or leaning will send a message (often an incorrect message) and can
result in a miscommunication. The rider
should be looking up and ahead. The
rider’s shoulders must be square with the collar bones spread.
The
stomach is held in and the back is straight.
Avoid arching the back, as this tips the pelvis forward and the pubic
bone down, driving the shoulders of the horse down and the horse will not be
able to lift his back effectively.
The
rider’s legs should hang down so the inside of the thigh is against the saddle.
The knee should be slightly out, not pinched into the saddle. The heel will be
in alignment with the rider’s shoulder and hip.
The
foot should rest in the stirrup on the ball of the foot and with the weight
distributed evenly across the foot. The
heel will be lower than the toe, allowing the leg to be as long as possible to
aid the horse. When the heel is lower than the toe, the ankle absorbs the
bounce, so that the motion goes down the leg not out the top of the rider’s
head.
The
toe should turn out slightly to allow contact with the horse by the calf of the
leg.
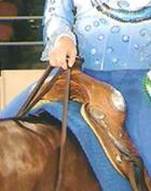
A
Rider with Good Posture
When
riding with two hands the arms will be bent at the elbow and the hands will be
held in front of the saddle pommel. The hands will be held apart the width of
the horse’s mouth.
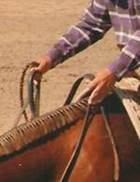
Riding
with Two Hands
Hold
the reins lightly in your hand. Avoid
gripping the reins tightly as this tension will be transferred to the
horse. When making contact with the
mouth, bend the elbow so the forearm moves toward your shoulder. Do not pull the elbow back behind your body.
When
riding with one hand, the hand will be held in front of the saddle horn and
just over the center of the horse’s neck.
Make mouth contact through the reins by bending the elbow and lifting
the hand straight up from the horse’s neck.
Riding
with One hand
When
using the leg, first apply the calf of the leg.
If the desired response is not forthcoming, allow the heel to come into
contact with the horse. Bouncing or bumping the leg will strengthen your
communication to the horse.
If
the horse is unresponsive, a pair of spurs may help. When using spurs, you
first apply the leg and then the spur.
Simply apply light pressure with the spur rowel. To become stronger with the spur aid, give
small taps with the spur.
If
the horse is stubborn or rebellious roll the spur on the horse’s side. This is to be followed immediately by a release
of the spur when the horse complies.
Always give the horse the benefit of any doubt about his response. You
can test the horse’s understanding of the leg cue by going back to leg only. If you get a good response, the spur is no
longer needed. However, if the response
is just “so, so”, continue to use the spur lightly. Some horses will require the use of spurs
forever. This is perfectly correct. As the horse gains understanding of the cues,
you can be lighter and more accurate with the cue placement when wearing a
spur.
The
purpose of the spur is to allow the rider to use very subtle and exacting aids
when communicating with the finished horse.
The spurs will touch the exact the spot needed to maneuver the horse
through a series of obstacles.
When
training the uneducated horse, always go back to less pressure and a more
subtle communication to test the horse’s learning. The spur used more severely is only to
reinforce a message given, but ignored.
The spur pressure is to be released the instant the horse complies.
Rider
leg position when turning is very important.
When
turning, the rider’s inside leg will be held just behind the cinch. This allows the horse to bend around your
leg. The outside leg is held slightly
back from the cinch. This is to support the horse’s rib cage and push the
horse’s body around the turn.
When
riding, the rider’s legs will be used to direct the horse, create impulsion and
to support the horse’s body. The leg is
used just behind the cinch to maneuver the shoulders. The leg hangs under the rider’s seat to
support the rib cage and round the horse’s back. The leg is used farther back
to direct the hindquarters.
You
ride with your legs, and leg aids will be part of every maneuver. The degree of leg pressure will depend on the
horse and what is being asked.
Too
much emphasis is placed on the hands or bit to control the horse. In truth, the
bit and hands only position the horse’s chin and bend the neck around. Without communication with the rest of the
body by the rider’s legs, the horse will be lost. Communication with the legs and seat control
the entire body, and prevent the horse from being left all alone. The touch of the rider’s legs makes the horse
feel more secure and connected to the rider.
When
asking for a turn, first position your legs, then depending on the response
from the horse, you use more or less pressure.
When
you ask for a turn, several things can happen. The horse may start leaning to
the inside; more inside leg is needed to hold the horse up and allow him to
bend around. The horse’s hindquarters
may be swinging to the outside; more outside leg is needed to support and keep
the horse on the correct track. The
horse may not begin the turn; more outside leg is needed to push the horse
around. Or the horse may be heavy on the
forehand; more inside leg is needed to square the horse’s shoulders.
The
rein aid plays an important role too.
Commonly
riders tend to overuse the rein aid and confuse the horse. The rein aid is essential. However, too strong a rein aid will only
hinder and confuse the horse.
When
riding the young or green horse, you will most likely be using a snaffle
bit. The snaffle bit is designed to be
used with two hands. The bit rings pull
on the side of the horse’s mouth and the mouthpiece presses down on the bar of
the mouth.
When
positioning the hands and arms with a snaffle, ride with one rein in each
hand. Hold your arms at a 90-degree
angle, with your elbows held at your side or slightly forward. The hands should remain in front of the
saddle pommel. The hands will be spread approximately the width of the horse’s
mouth.
When
applying contact with the mouth, bend your elbow to lift the rein straight up
from the horse’s shoulder until contact is established. This mouth contact is a
barrier---a closing of a door. The rider then gives a leg aid which will direct
the horse through the open door.
The
barrier set by the hand straight above the shoulder is the closed door. By moving the hand away from the shoulder you
open a door for the horse to move through.
The
rein held against the neck closes the door.
It
is very important to avoid crossing a rein over the
neck. This action will counter bend the
horse and cause the shoulder to lean incorrectly.
The
rider’s position can be viewed in much the same way as the horse’s
conformation. If the rider’s position is
perfect and the horse’s conformation is perfect, things are pretty easy. On the other hand, when things aren’t
perfect, we need other factors to help us.
We’ve
discussed how the horse’s disposition can help overcome some conformation
faults. The rider’s disposition is
helpful in overcoming some rider mistakes.
It’s
important you approach your horse’s training sessions with a “good disposition”. Be prepared to have an open mind. Be patient.
Ask for help. Try to see the problem from your horse’s perspective.
If
you find yourself getting frustrated and trying to intimidate your horse, your
disposition may be “sour” at that moment. Step back, settle down, take a deep
breath and think.
You
will do more damage in your training program by losing your temper than by
letting it go for one day and then approaching it again the next day. Hopefully, your “good disposition” has returned by the next day!
You
now know the conformation of a good trail horse, and the “heart” we hope he
has. Plus you know how to position
yourself in the saddle. So, let’s go do
some trail!