Training Performance Horses
Lesson Nine
PIVOTS,
SPINS,
Pivots on the hindquarters are the basis for the advanced exercises of rollbacks and spins, and can even qualify as part of the foundation work for the flying change of leads.
Once the trainer has mastered the two-track, shoulder-in, renvers and travers, the independent control of the forehand and hindquarters has been established. When the rider can move the forehand or the hindquarters at will, all advanced work is merely a matter of continuation and polishing.
A pivot on the hindquarters requires the horse to move the forehand around the hindquarters in a forward motion. While the horse does establish a pivot foot, he must not shift his weight backward, or step backward. The designated pivot foot is established by the horse stepping forward, the rider putting his weight on the pivot foot by sitting back and turning into the direction of the pivot. The horse will move around the forward placed pivot foot, using the strength of the hindquarters to hold his pivot position.
For example, the sequence of strides for a pivot on the hindquarters to the left is the left hind foot forward and planted as the pivot foot. The horse will then move the right fore foot across in front of the left fore foot. The left fore foot is the third step and moves to the left and back. The final step is the right hind foot, which pushes and drives the horse’s body over the pivot foot. The right hind foot never crosses in front of the left hind, but always remains as a whipping-power foot. The sequence is in the form of a figure 8.
To begin teaching the pivot, walk the horse in a straight line, give the cues for the stop, and stop the horse with the desired pivot foot forward. If you want to pivot to the left, the left hind foot must be planted forward as the pivot foot. You must be able to feel the horse as he walks, ask for the stop and set the horse up to stop with the left hind foot forward.

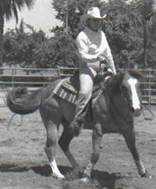
When pivoting on the hindquarters, the horse is
pushed around the pivot foot with rein and leg pressure. The horse is never
pulled into the turn.
With the pivot foot in the correct position, turn your body to the left. Do not exaggerate the movement; simply turn to the left, allowing your left hip to move backward and your weight to shift toward the horse’s left hip.
Gently tip the horse’s nose to the left. Do not pull the horse’s nose to left, and do not maintain a contact on the horse’s mouth through the left rein. With the horse’s nose tipped to the left, push the right rein into the horse’s neck at the same time as you apply right leg pressure at the girth. The idea is to push the horse--with indirect rein and leg--into the direction of the pivot.
Never use a rein to pull the horse into the direction of the pivot. To do so will only cause the horse to swing his hindquarters away from the direction of the pivot and off his pivot foot, or teach the horse to "rubber neck"--bend his neck to his side to avoid the pull of the rein.
As you push the horse into the direction of the pivot--left--you will notice the horse will most likely step to the left and backward with his left fore foot. All action initiates in the hindquarters and it has already happened. When you shifted your weight and began the pushing action of the right rein, the horse began extending the muscles of the hindquarters, causing him to lose his balance forward and to the left. The hindquarter's muscles have already begun to move the horse even though neither hind foot has moved.
As the horse steps left and back with the left fore foot, the right hind foot will drive harder to push the horse’s body around the pivot foot. This whipping action will cause the horse to replant the pivot foot, or at the very least to rebalance the pivot foot. The rebalancing restarts the stride sequence, so the next foot to move will be the right fore foot which will move to the left and cross over in front of the left fore foot. The left fore foot now must reestablish balance by moving left and back again. Finally, the right hind will push off again and it will once more be necessary for the left hind to reposition itself as the pivot foot.
As long as the rider is constantly asking the horse for forward movement, the pivot will be correct, if not perfectly smooth or fast. The rider must never ask the horse for a backward step when performing a pivot.
The horse’s body should remain nearly straight, the nose tipped only slightly into the direction of travel.
The rider must lead the horse into the pivot by turning his body into the direction of travel, but the action should be subtle. The two strongest cues should be the rider’s right leg pressure and the pushing action of the right rein into the horse’s neck. While the rider’s weight will be shifted toward the left hip, the rider wants to remain sitting pretty much in the center of the horse, the position best suited for a fast pivot--the spin.
Pivots should always be done slowly and as smoothly as possible. You want the horse to begin the sequence of foot fall and continue it. The horse should not take a step or two, then stop all action. The action should be started on the rider’s request and continue until the rider gives the stopping cues.
To stop the horse, the rider should say, "Ho," then remove both the rein and leg cues. The horse should stop immediately on the release of the cues. Do not create mouth contact through the reins when stopping a horse in a pivot. The discontinuance of the leg and rein cues following the verbal command, "Ho", must become the only cues required to stop the pivot.
Practice stopping at various places within the pivot. Pick an exact spot for the stop, then practice until you can stop the horse at exactly that spot.
For example, in competition a spinning horse will have to stop at exactly one and one-half turns. To stop before the completion of the exercise, or to go past the completion point, will bring point deductions from the judges.
Once you have mastered pivots, teaching the spin is relatively easy.
Do not seek speed. It will come with understanding on the part of the horse and expertise on the part of the rider.
Begin training for the spin by jogging the horse in a circle. Tip the horse’s nose into the direction of the turn, but don’t allow the horse to bend around your inside leg, and be very careful not to mistakenly encourage the horse to move away from your inside leg. The horse should jog the circle holding his body relatively straight. Because you are on a circle, there will be some bend as the horse follows his nose.
Don’t seek bend and don’t use any inside rein. The inside rein must be loose.
The horse should be turning on the circle because the rider is leading the horse with a slight weight shift, a pushing indirect rein and a pushing leg cue.
For example, if the spin is to be to the right, the rider will turn his body slightly to the right to establish the right hind foot as the pivot foot. (In turning to the right, the rider actually shifts his weight to the right and rearward without conscious thought.) Then the rider will give an indirect left rein cue at the same time he begins to apply left leg pressure at the girth.
The goal you seek is having the horse turn to the right to such a great degree that he must establish a pivot foot. You do not want to pull the horse backward onto the pivot foot. When done correctly, the horse is not actually moving forward, but his motion remains the same. There is a fine balance to be maintained. The horse will have his weight primarily on the pivot foot, but he will not be stepping backward. He will always rebalance the pivot foot by stepping a fraction of an inch forward. As long as the horse is not moving backward, he’ll remain low in front, driving from behind.
To accomplish this, the rider may have to employ a slight indirect rein of opposition, which is used to turn and stop forward motion at the same time.
For example, the indirect rein of opposition, if moving to the right, requires the rider to push the left indirect rein into the horse’s neck, while also moving the rein slightly back toward the rider’s right hip. The indirect rein into the neck causes the horse to move the forehand to the right, while the same rein is also a rein of opposition because it is being shortened and establishing mouth contact. The rein of opposition stops the horse’s forward progress. Thus together, the actions are those of the indirect rein of opposition.
The indirect rein of opposition must be used very carefully and lightly when asking for a spin. All you want to do is help hold the horse on the established pivot foot. You do not want to pull the horse backward.
As you jog the circle to the right, attempt to get the horse to tighten the circle because he is responding to the indirect left rein and the left leg pressure at the girth. If the horse attempts to move forward from his pivot foot, change the indirect left rein to an indirect left rein of opposition. Return to the indirect left rein immediately upon the horse’s first response to mouth contact. All you want to do is stop forward movement; you don’t want to create backward movement.
Again, do not ask for speed. Try to make the jogging circle smaller and smaller until the horse is actually turning the forehand around the hindquarters. If the turn is smooth and steady, the horse is spinning.
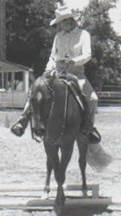
When spinning, the horse should have a four-foot,
figure 8 footfall sequence. That means the horse must pick up and replace the
pivot foot.
The sequence of strides for the spin is the same as for the pivot on the hindquarters. The spin is nothing more than a pivot with speed.
As you work the horse on jogging the small circle, then bringing him into a spin, you will find the horse soon wants to pivot more than jog. For the horse, the smooth, steady spin is actually less strenuous than jogging the very small circle.
You can increase the horse’s speed by using a "bumping" leg cue; sometimes even reaching up and bumping the horse on the shoulder. Don’t get in a hurry to achieve speed. Increase the speed slowly by getting the horse to understand he must get away from the indirect rein. Put the rein on his neck, and if he doesn’t immediately attempt to get away from it, bump him hard with your heel. (Don’t start seeking speed by wearing spurs. Use your heel. Spurs will come later when you want accuracy with your cues. If you do wear spurs, use them sparingly and they will be more effective.)
Speed with the spin comes from the horse’s increased ability to work laterally. It takes practice.
You can get a very satisfactory spin without abuse.
When you spin the horse with speed, you will find it best for both horse and rider if the rider does not turn too much into the direction of travel. If you lean too much into the direction of travel, you place too much weight on the horse’s pivot foot and it becomes difficult for him to replant the foot. When the spin has been perfected, the horse knows what the cues mean, and the cues can be much more subtle. When spinning with speed, don’t twist your body into the direction of travel, but look just to the side of the horse’s neck. If spinning to the right, look just passed the right side of the horse’s neck. This will be sufficient to shift your weight to indicate the pivot foot, yet will not overload the horse’s laterally moving inside right front foot.
As the horse picks up speed, you’ll find that you are sitting in the "well"--that quiet spot in which you don’t get behind or ahead of the spin. When a horse is spinning with great speed, you want to be just barely to the inside of the turn.
Always keep in mind the horse has no lateral flexion in the joints below the elbow, so the horse must move his front leg by swinging it outward and laterally from the shoulder. This is very difficult and takes some conditioning.
Overworking a horse on pivots and spins can happen quickly, so be aware of how much you are asking of your partner. If your horse gets tired, accidentally strikes his leg, or just simply doesn’t quite get the idea, don’t force the issue. Take some time off, and then begin again.
Once you get the basic movement mastered, smoothness and speed are a matter of practice--definitely not force.
Rollbacks--a change of direction in one action--are two basic maneuvers combined into a single fluid exercise.
The rollback is made-up of the basics of a stop and the basics of a pivot. A rollback to the right requires the horse to stop his forward motion, pivot to the right 180 degrees, and then proceed in the new direction resuming his previous gait.
The cues for the rollback start with the rider giving the cues for a stop, but without the verbal command, "Ho." The rider will tighten his stomach muscles and discontinue leg pressure, then begin taking the slack out of the reins.
At this moment, the rider begins telling the horse a turn is required. To do this, the rider turns his body into the desired direction of travel, to the right, for example, and back over the horse’s right hind foot. The rider will employ the left indirect rein of opposition by bringing the rein back toward his right hip. (The left rein must not be shortened to the point of pulling on the horse’s nose, tipping it to the left.) This reining cue stops the horse’s forward action and calls for a turning action to the right. The rider applies strong left leg pressure at the girth to bring the horse around quickly. As the horse approaches the 180-degree mark, the rider discontinues the indirect rein of opposition and allows the horse to find the center of the reins and begin forward movement.
Having made the turn, the rider must give the correct leg cues to insure the horse reestablishes the gait being worked prior to the direction reversal. If the horse was walking, the horse must walk after the rollback. If the horse was loping, then the horse must lope out of the rollback.
When practicing the rollback, start by riding your horse toward a fence line at a 45-degree angle. (Riding back and forth across a corner of an arena makes the exercise a little easier.) Just as you approach the fence, give the physical cues to stop the horse, but instead if sitting straight in the saddle, begin turning your body into the direction of travel. With a rollback, an exaggerated turn is helpful. Don’t be afraid to turn and look back over your horse's rump. An exaggerated weight shift not only helps hold the horse’s pivot foot, but it encourages you to apply strong outside leg pressure to push the horse through the pivot.
Lead the horse through the turn and you will be in perfect position to pitch the reins and urge the horse forward as he completes the direction reversal.
Done correctly, there is no action stop during a rollback.
As an example, let’s say the horse is moving toward the north. Asking for the rollback, you begin to stop the horse, and by applying the indirect rein of opposition and turning your body, you have the horse making the turn before his stop is complete. By using strong leg pressure to push the horse through the turn, you are also pushing the horse forward even before the turn is complete. And when the rollback is complete, the horse is moving toward the south.
Two maneuvers--the stop and the pivot--become one--the rollback.
Never seek speed in the rollback: always seek smoothness.
This is another of the lateral movements which can be so difficult for the horse. Be sure you have mastered the basics and that you are in the correct position to make it possible for the horse to complete the exercise. Your cues must be given in the correct sequence, and you must lead the horse through the rollback.
It is often easier for the horse to learn the rollback from the jog than from the walk. The impulsion created by the jog helps the horse to move through the pivot with greater smoothness. Once the foundation has been set, the rollback from the lope is very easy.
Good side-pass and half-pass work will make the flying change of leads easy for the horse to understand and perform.
The side-pass is unique to the western horse, but I think it should be mastered by all horses. In the side-pass, the horse crosses his legs as he moves directly sideways, left or right. For example, if the horse is moving to the left, the right fore leg and the right hind leg will cross over and in front of the left fore leg and left hind leg. It is incorrect for the horse to move his feet together, or to cross behind the opposite leg.
In side-passing, half-passing and flying change of leads, just as in two-tracking, the rider should shift his weight away from the direction of travel. This change in weight cue is always done with lateral work (exercises in which the horse is moving sideways) which does not require speed. When the horse is working with speed, as in a spin or rollback, the rider will shift his weight into the direction of travel.
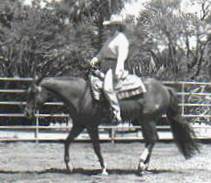
When side-passing, the horse must cross both front
and hind legs in front of the opposite legs. For example, moving to the left,
the right legs cross in front of the left legs.
The side-pass can easily be taught by starting with two-track. Start the horse two-tracking down a fence line. If you are moving to the left, your right leg should drop back and push the hindquarters to the left, bringing the horse into a 45-degree angle to the fence. Your left rein is already being used as a blocking rein to slow the horse’s forehand.
Now shift your weight dramatically to the right, release the blocking left rein and push the forehand to the left with an indirect right rein. Push the hindquarters to the left with strong right leg pressure. Allow the fence line to keep the horse from moving forward. The horse should easily move to the left with a straight body, nose tipped slightly into the direction of travel.
When doing the side-pass off a fence line, the rider should shorten the reins to set a bit barrier to forward motion. If the side-pass is to be to the right, the rider will shift his weight to the left, apply light leg pressure to move the hindquarters to the right, and light left indirect rein pressure to move the forehand to the right. It is correct to allow the forehand to lead the hindquarters slightly, but only slightly. The horse should continue to move his whole body to the right as he side-passes. It is incorrect to have the horse move the hindquarters, then stop the hindquarter movement while the forehand catches up.
While the horse is learning, the rider may be required to exaggerate the weight shift, and may also need to apply quite strong leg pressure. (When the horse’s work becomes more refined, the weight shift can be minimized.) As the horse moves away from the left leg pressure, the rider may find the horse attempting to turn his head and neck to the right. The rider must hold the head and neck straight. In this case, use an indirect right rein pressure. The rider must be constantly alert, always ready to make compensating corrections to keep the horse moving smoothly.
The horse should be balanced equally on the forehand and hindquarters, and should continue a steady movement until the rider stops the action. The exercise can be ended by the rider simply returning his weight to the center of the horse, relaxing the leg pressure and dropping the reins. The horse should come to rest immediately.
Use reining cues first to correct any misplacement of the horse’s body rather than using leg pressure cues. For the horse, leg pressure cues are more closely associated with pivots.
In a half-pass, the horse moves with his body forward in a straight line while also moving sideways. If half-passing to the left, for example, the horse will move forward and to the left at the same time. The horse does cross his legs, just as in a side-pass, but not to such a great extent.
To elicit the half-pass to the left, shift your weight to the right side of the horse and apply right leg pressure at the center of the horse’s body. You do not want to reach back to apply leg pressure, which would move the hindquarters, or bring your leg forward, giving instruction to move the forehand. Hold the horse on a straight line by keeping the horse even between the left and right reins. Keep the horse centered between the reins, getting the horse to move sideways on weight shift and leg pressure cues.
If the horse does not move to the left in response to the weight and leg cues, then you may have to apply some indirect right rein to push the horse over. In doing so, it is most likely you will also have to move your right leg pressure cue back to encourage the hindquarters to keep up with the forehand. It may also be necessary to move your left leg forward to block the forehand from attempting to turn to the left in reaction to the rein pressure.
Half-passing can be done at the walk, jog and lope, and will be very easy once the horse learns to move away from the weight shift. Half-passing is not a difficult exercise for the horse, but one which requires constant practice if the horse is to remain responsive to the weight shift away from the direction of travel. If the rider is careful not to apply a reining cue, then the horse will soon understand the rider is not leading the horse into a turn, but instead is seeking lateral movement.
Click Here For Videos: Half Pass To The Left Half Pass To The Right
The correct half-pass movement is an excellent exercise to establish a good foundation for the flying change of lead.
The flying change of lead, when perfected is requested by a simple shifting of the rider’s weight.
Because the flying change is a natural movement for the horse, it requires more in the way of timing than in active cues. The two cues needed are a shift of weight and a switch of the rider’s leg.
A brief look at the movement of the horse’s legs at the lope make it obvious why the timing of cues is so important.
The lope on the left lead is a three-beat gait in which the action is initiated by the horse’s right hind foot. The second beat of the gait is the left hind foot and the right fore foot moving together, and the third beat is the leading left fore foot.
Just as the leading left fore foot is being grounded, the horse has both hind feet off the ground for a fraction of a second. This is the moment in which the horse can change perfectly within the three--beat sequence. To assure the horse has the opportunity to make the change, the rider must begin his cues while the leading fore foot is in the air. This allows the horse ample time to understand and respond to the cues.
To put the horse on the left lead, you shift your weight back and to the right to establish a shortened right hind stride. Allow your left leg to move slightly forward toward the horse’s left shoulder. This is a natural movement of the rider and precedes the natural extension of the horse’s muscles on the left side.
Apply very gentle direct left rein pressure to tip the horse's nose left and inform the horse the direction of travel will be to the left.
When the horse is on the left lead, the horse’s muscles on the left side are extended. This turns the rider’s body slightly and pushes the rider’s left hip forward. In this position, the rider is able to feel the horse is on the requested lead. The rider should never look down at the horse’s shoulder or lean forward to look for the leading fore leg. Doing either puts both horse and rider out of a balanced and natural position for the exercise.
Timing is the most critical element in requesting a flying change of lead. If the rider asks too soon or too late, the horse is not in a position to make the change in a single sequence of leg movements. If the rider’s timing is off, the horse will often change in front, but fail to make the change behind until the following lope sequence.
By asking the horse to change while the leading fore leg is in flight, the horse has the opportunity to make the change behind first, then complete the lope sequence with a change of leads in front.
So as the leading fore leg is coming forward, the rider gently lifts the reins to slow and gather the horse, while shifting his weight from one side to the other. If the horse is on the left lead, the weight shift will be from the right hip to the left hip. As the weight transfer is being made, the rider must let his legs follow naturally, the left leg going back and the right leg moving forward. A light indirect left rein tells the horse he is now on a gentle circle to the right.
Practice saying to yourself, "now," as the leading fore leg is coming forward. Be sure you are fully in sync with the rhythm of the horse’s stride. As you say, "now," make your weight shift change.
When you give the cues, give them simultaneously.
Your weight shift causes the horse’s left hind foot to be grounded first. Your left leg pressure informs the horse that his left hind leg is to pick up the driving action instead of the leading action, and the indirect left rein pressure tells the horse the new direction of travel. Done correctly, the change of lead will take place in one smooth movement of a single three-beat sequence.
Too often rider’s try to force the flying change by throwing the horse off balance and into a new direction of travel, or by using extreme leg cues. Such actions always result in the horse resenting the exercise. The horse expresses his anger by speeding up, wringing his tail, throwing his head or combining all of these faults.
All that is required is that you inform the horse with gentle cues at the correct time, then give the horse the freedom necessary to respond. No forced, harshly demanding flying change will be as smooth and graceful as the horse’s natural change.
You can begin training for the flying change as soon as the horse fully understands and responds to your request for a particular lead.
There are several things you can do to make it easy for the horse to make the flying change. The first is to never make flying changes a singular exercise. Always practice and ask for the flying changes while you are working various exercises. Think of the change as a natural movement, ask for it that way, and expect to get it. If it doesn’t occur, simply reestablish your cues for a particular lead and go on loping as if nothing happened.
Secondly, do lots of counter-canters. If you are moving to the left, ask the horse for the right lead and vice versa. You want your horse to take the lead you request without hesitation.
When your horse will work counter-canters smoothly and without straining to maintain balance, then flying changes of lead will be easy.
Lope your horse to the left on the right lead, and when he shows any sign of becoming tired, simply ask for the flying change. The horse will be happy to cooperate just to give his driving muscles a rest.
Works lots straight lines. Circles are great for supplying your horse, and having a supple horse is a very big asset. But straight lines are not usually worked often enough. Many horses can’t work a straight line because they are never asked to do so. You must keep your horse riding between your legs and listening to your legs. Only then will he be able to work on a straight line. Always begin loping on a straight line. Do not let your horse turn his body, or lope off by moving away from your cueing leg pressure.
On the right lead, the rider wants to begin the
change of lead cues as the right front leg is moving forward.
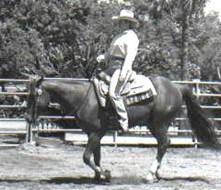
The rider shifts her weight from her left hip (cue
for the right lead) to the right hip, the cue telling the horse she wants the
left lead.
The rider’s weight is shifted as the horse’s hind
feet are off the ground and passing in mid air.
The horse makes the change in a single stride if
he changes behind first.
Don’t work figure 8’s or ask for flying changes in the same place. Never allow the horse to make the change on his own. Always make the horse wait for your request.
Never allow the horse to rush the flying change, or speed up before, during or after the flying change. It is a good idea to practice the flying change a time or two, then instead of asking for a change, stop the horse. Let him rest, back him, walk him off, and then lope again. Teach patience and keep the horse thinking, "slow and easy."
You now know all the elements of training.
It is up to you to apply your knowledge with thought and understanding.
Never rush your horse’s training. Slow, steady conditioning results in rapid progress. Mastery of basics brings championships. The horse’s natural talents cannot shine until the foundation is solid.
You are responsible for the results achieved. You cannot blame your horse, or say he won’t perform correctly. He can do all the exercises in these lessons, and he will perform if you think about communicating your desires to him. Training horses is a mind game. There is no doubt; the great trainers have physical talents. But it is their thinking which makes them superior.
Finally, be sure
Train because you want to help horses, and because you love the challenge of helping them reach their full potential.
Smile and enjoy the ride.
Assignment:
A video of you performing the exercises described in this lesson is required. You may post the video to a video hosting web site; for example - YouTube. Please send the link to elblazer@horsecoursesonline.com