Training Performance Horses
Lesson Six
STOPPING THE HORSE FOR ANY PERFORMANCE
A good stop is the first specific performance you want from any horse.
A hunter or jumper who stops well will begin give to the bit immediately, once it is set, and come to a relatively square halt within two or three strides. The hunter or jumper does not push back against the bit, but gives willingly and uses his hindquarters to balance and square himself.
The dressage horse must come to a perfectly square stop. He is seldom asked for a hard stop from the extended trot or canter. It is expected he will most often be at the working trot or walk when asked to stop squarely. Again, the horse is expected to use his hindquarters and finish his stop with his hind and forefeet evenly spaced and positioned.
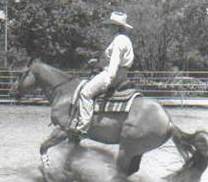
The western horse in competition is asked for a hard stop on some occasions. The sliding stop is only asked of reining or working cow horses. When asked to stop, the western horse should drive his hind feet well up under his body and almost sit down. A good stopper will keep both hind feet together and square. He will not lean against the bit, but will actually walk with the front feet as the back feet slide. The slide is created by the horse’s momentum, not by pulling back on the reins.
In fact, no horse is stopped by pulling back on the reins. Pulling back on the reins to stop a horse is an incorrect action on the part of the rider. The correct action for the rider is to set a barrier to forward movement by establishing bit position. This is done by a slight elevation of the hand, which changes the bit’s position within the horse’s mouth. Having positioned the bit to signal the horse to discontinue forward action, the rider then rides the horse into the fixed position. (In the case of the sliding stops with reining horses, the rider actually stops riding the horse.) The horse will shorten his body as much as possible to stay behind the fixed bit position. For the English horse, moving forward several steps is acceptable as he comes to a halt behind the bit. An immediate square stop is not required, nor expected, unless the horse is moving very slowly.
For the western horse, however, it is expected he will begin the stop instantly by bringing his hind feet well under the body and will not take another driving step with the hind feet. If the western horse is moving with speed, he will not be able to shorten his body easily enough to stop behind the fixed bit position. To shorten his body enough to stay behind the bit, the horse rounds his back up and drops his hindquarters. Even then he will often slide a foot or two just trying to stay behind the bit barrier. If the horse has a lot of momentum, he can slide several yards on his hind feet while his front feet keep walking.
Conformation plays an important role in how well a horse stops.
Every horse can perform an acceptable stop, but if a horse isn't built to slide stop, he’ll never achieve winning slides. Study your horse’s conformation and determine what he can and cannot do. Then choose performances suited to his conformation and you will find he can do them easily. Asking a horse to do things he isn’t physically constructed to do eventually results in injury.
A horse, which has a natural stop, will be relatively light in the forehand and heavy in the hindquarters. This is the confirmation required for a good stock horse or cutting horse.
The horse needs a strong short back, strong loins and good, well-muscled legs. The best stoppers will naturally work with their hind legs well under them. A horse whose hind legs are too straight or whose legs hang out behind his rump will have trouble with the hard sliding stop.
The best stops at world class levels all start with the first communication lesson, the verbal command to "ho," or "whoa."
While on the lead line, the horse is told to "ho," and the verbal command is followed by a physical cue--a gentle tug on the lead. If the horse doesn’t stop, the verbal command is given again, followed by the physical cue. The process is repeated again and again until the horse understands the verbal request and the physical cue.
The exact same process is repeated while teaching the horse to stop on the lunge line. The trainer gives the verbal command to "ho," and follows it with a physical cue, a gentle jerk on the lunge line. (Be sure you are lungeing the horse with a chain over his nose so the gentle jerk on the line has some meaning. If you cannot get the horse’s attention, the physical cue is useless.) The cues are repeated again and again until the horse is stopping immediately upon the cues, and does not move until he is given a new request. If the horse is a quick learner and a natural stopper, he’ll slam on the brakes as soon as he hears the verbal command. Much of the time you won’t have a chance to jerk the lunge line.
Make it a point to get the horse to stop squarely and to remain in position to continue the direction of travel. Do not allow the horse to come to a sloppy stop and then turn and face you. Allowing a horse to stop in that manner will only complicate matters later when the horse is ridden. Everything you do with a horse is a training session. So if the horse is allowed to be lazy and careless in his early work, he’ll carry that attitude to his advanced work.
Teaching the young horse to stop requires the rider perform six actions in sequence:
1. Establish the timing for the stop.
2. Give the verbal command to "ho."
3. Set the bit as a barrier to forward movement.
4. Tighten the stomach muscles.
5. Squeeze with both legs.
6. Release the bit barrier immediately after the horse has come to a complete stop.
Timing is an aide to getting a good stop with any horse, but it is critical with the horse being asked to slide.
The rider should begin the cues to stop just as the leading forefoot hits the ground. If the horse is trotting or walking, begin the cues as the forefoot corresponding to the direction of travel hits the ground. If you are moving to the left, begin the cues as the left forefoot strikes the ground.
In concert with the timing, the rider gives the verbal command to "ho." The command should be given in a normal to quiet voice. Don’t yell at the young horse. Give the command just as you would if you were leading or lungeing the horse.
Using a snaffle bit on the young horse, the rider will have a direct rein in each hand. The rider may lift either the left or right hand to set the bit as a barrier to forward movement. (It is thought best by most trainers to lift the hand corresponding to the direction of travel--the left hand if the horse is traveling to the left.) If the rider, for example, lifts his left hand (simply roll the thumb toward the left so the palm of the hand is facing up), the right hand remains steady, holding the right side of the bit in position. By lifting the hand, the rider actually applies pressure to the left side of the horse’s mouth, at the same time elevating the head slightly, but not tipping it to the left. The horse’s head should not turn to the left or right. The slight elevating of the head encourages the horse to be light on the forehead and start shifting his weight to the hindquarters.
While giving the verbal and bit cue, the rider tightens his or her stomach muscles. If the stomach muscles are tight, the rider cannot lean forward or backward. It is extremely important the rider does not lean his upper body backward. The upper body should remain erect so the horse is not thrown out of balance.
The rider squeezes the horse with both legs, applying light equal pressure to encourage the horse to drive in to the bit barrier. The horse should round his back upward when coming to a stop. If the rider doesn’t apply leg pressure, the horse will stop driving with the hindquarters and his back will sag.
As soon as the horse begins to respond to the verbal and physical cues, the rider must release the bit barrier. Releasing the bit barrier rewards the horse for his response. The reins should not be pitched away, but should be loose enough to remove the possibility of bit pressure. If the rider holds the bit barrier too long after the stop, the horse will be subject to severe mouth pressure and will start looking for a way to avoid the discomfort. Most of the time, a horse attempts to avoid the bit barrier by throwing his head up, down, or to one side or the other. Such behavior by the horse means the rider should immediately reassess his stopping cues and teaching techniques.
Allowing plenty of time to learn is the key to teaching stopping, as it is with other specific performances. Don’t rush the horse or attempt to force compliance. It is a repetition of the correct cues in the right sequence, which will result in the desired performance.
The most critical cues to stopping the English style horse is the tightening of the rider’s stomach muscles and pressure applied by the rider’s legs. Neither should be exaggerated, but both must be consistent.
When the rider tightens the stomach muscles, the pelvic bones drop backward and downward putting the rider’s seat deep in the saddle. This weight shift should immediately cause the horse to tighten his loin muscles. This rounds the horse’s back and allows the hindquarters to move under the body. It is this action, which creates the square, balanced stop.
Attempting to stay behind the bit barrier, the horse shortens his body as much as he can. This results in the square stop.
Again, the rider must release the bit barrier position the instant the horse begins to respond to the verbal and physical cues. If the rider holds the bit position beyond the horse’s initial reaction, the horse is subject to unnecessary punishment. It won’t be long before the horse is attempting to avoid the stopping cues rather than responding to them.
It is expected the western horse should know how to slide, even if only in a token manner for style. The western horse responds to the same cue request, but the cues are given in a different sequence.
The first cue to the horse for the western slide stop is squeezing the horse forward with both legs. The slide stop always comes from a run, because it is the momentum of the horse’s forward movement alone, which creates the slide. So the rider will ask the horse to canter, then increase speed to a run. To increase the horse’s speed, the rider squeezes harder with both legs and keeps the pressure steady.
When the rider is ready to stop, the rider will do four things nearly simultaneously, and follow those cues immediately by two others.
When stopping, give the verbal command before the physical cues. Never surprise your partner, help him.
The rider establishes the timing for the stop. Then the rider gives the verbal command, "ho" while releasing leg pressure from the horse’s sides, and the rider sets the bit barrier. The instant the horse begins to respond, the rider removes the bit barrier position and tightens his stomach muscles to hold his upper body erect.
By having the bit barrier released, the horse’s head remains free and easily aids the horse’s balance as he sits on his hindquarters and stops squarely.
If the horse is learning his stopping cues well, and the rider is giving the cues correctly, the western horse will leave little skid marks with his hind feet, even when stopping without speed.
It will take some time to condition the horse and make him physically strong enough to perform slide stops. Don’t get impatient to do a slide stop. If the horse is reacting correctly, the slide will be there when the horse is physically capable, and moving with enough speed.
Practice stops without seeking perfection from the horse. Seek perfection from yourself when giving the cues. If the cues are given correctly, the horse will learn quickly to respond properly. Horses don’t mind giving you a good stop as long as it is not painful or punishing.
Practice stops at the walk, then the jog or trot, and finally at the lope or canter. A horse, which does not stop perfectly at the walk, is not ready to stop well at the jog or trot. You should be looking for the perfect stop--and giving all the cues correctly to get it--at any gait. But by adding speed, you are putting more mental pressure on the young horse. During any training session be certain the horse is stopping well at the walk and jog or trot before asking for stops from the lope or canter. (Use downward transitions--going from the trot to the walk, or from the lope to the trot--instead of stops if the horse is having difficulty with his new communication system.)
Confrontation is a requirement of learning, and is required any time the horse is not paying attention to the cues, is lackadaisical in his effort to stop, or begins to refuse to perform when asked.
The best attention-getter for the horse learning to stop is several quick jerks on one rein or the other, followed by an immediate release. Never overpower the horse by making a steady pull on the reins trying to stop him. It won’t work. The harder and longer the steady pull on the rein, the more determined the horse will be to simply run through the bit.
Pulling back on the reins without release creates bolters and runaways. Never continue a steady pull on the reins. It is never needed nor is it productive.
Checking or bumping the reins repeatedly will get the horse’s attention back on the request to stop, and will be enough confrontational punishment to discourage attempts to avoid responding to cues.
To keep the horse stopping sharply, the rider can ask the horse to back up immediately after coming to a stop. (The horse must be well-schooled in backing before employing this technique--don’t use it on a green colt which doesn’t understand the backing cues and aids.) By asking the horse to back immediately after the stop, you’ll get the horse to think more about using his hindquarters. To back, the horse has to shift his weight to the hindquarters, and if he is thinking about stopping, then backing, he’ll position himself even before being asked.
The cues for stopping are the same throughout the horse’s career. However, once the horse is on a curb bit, the rider must be careful in establishing the bit as a barrier to forward movement. With the leverage of a curb, too quick or strong a change in a bit position will often make the horse’s mouth sore. When setting a curb bit, remember there will be pressure on the horse's poll and chin.
English style horses will be on the bit in a curb or snaffle, so the horse schooled in that discipline will need only a closing of the fingers on the reins to set a bit barrier and produce a stop.
Western horses on a curb need only to have the slack taken from the reins. A slight lifting of the reins will accomplish this and the bit will be positioned while the other stopping cues are being given.
Be cognizant of the ground you are working on when practicing stops. Heavy clay or deep soil conditions are not conductive to good slide stops, or even good square stops. No matter the type of soil, the ground should be relatively level. Pits, dips and holes are liable to injure the horse when he is working at any exercise. Don’t practice stops on rough ground.
The best condition for stopping is a two-inch layer of sand or wood-shaving mix over a hard solid base. This gives the horse a good surface for all exercises, plus the hard base and lightness of topsoil for sliding.
If the horse is to be a reining or working cow horse, then shoeing will be an important consideration. I like to have the horse stopping well with regular training plates before I consider sliders. A wide sliding shoe (three-quarters of an inch) with a beveled toe is all that should be needed if the horse’s hoof has been well-trimmed.
Stop before you get started, and realize the best stops result from nearly imperceptible cues.
Lightness and assistance are the responsibility of the rider.
The physical stop is the horse’s job.
Assignment:
1. Send a picture of your horse taken from the side (no tack). Write a short essay of why you think your horse will be able to easily perform an excellent stop, or not easily perform a stop based on conformation. Send to: elblazer@horsecoursesonline.com
2. Send a short video of your horse executing stops on the lunge line at all three gaits. If you had trouble in lesson two, there should be some improvement by now. The horse must stop and stand still.
3. Send a short video of you riding your horse and stopping at all three gaits.
You may post the videos to a video hosting web site; for example: YouTube. Please send the link to elblazer@horsecoursesonline.com